Modern kitchen sink in stainless steel with fresh ingredients on the counter

Switching to Kitchen Sink in Stainless Steel: What to Expect and Why It’s Essential for Your Home in 2026

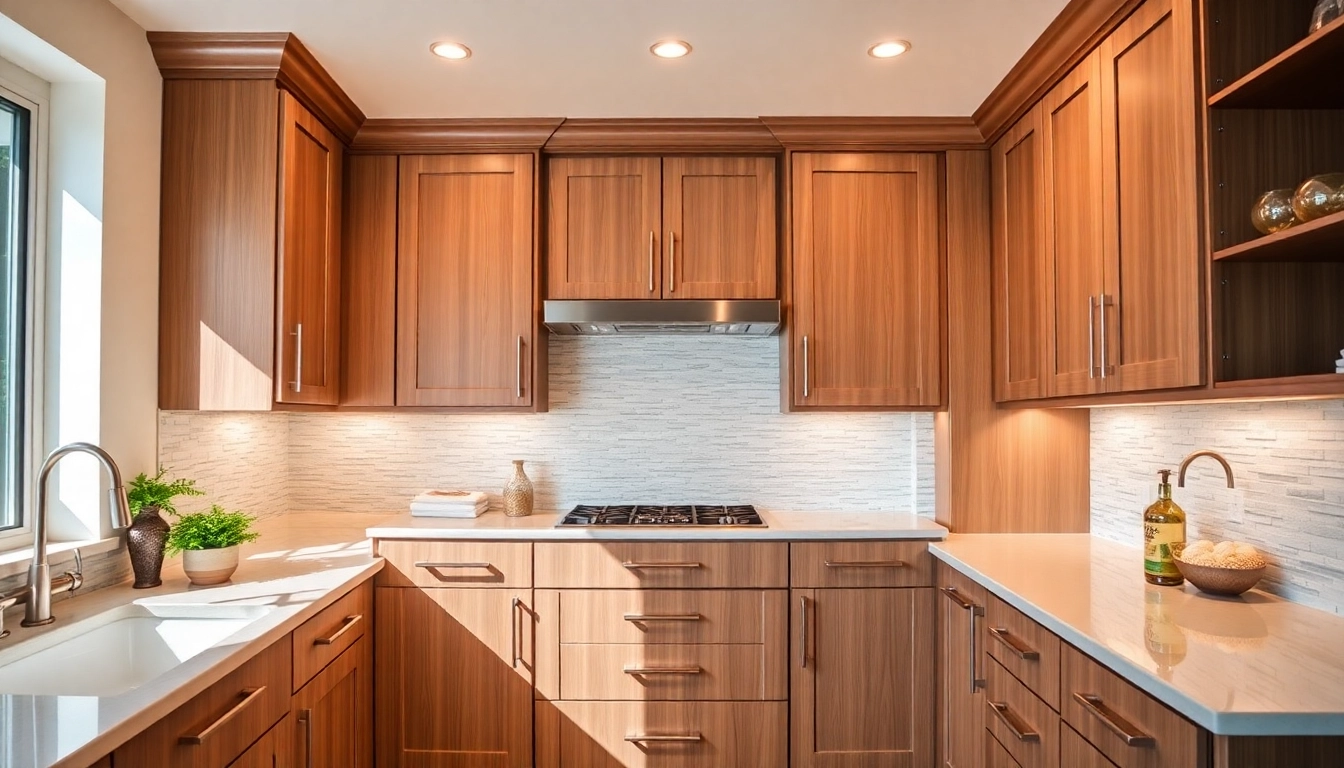
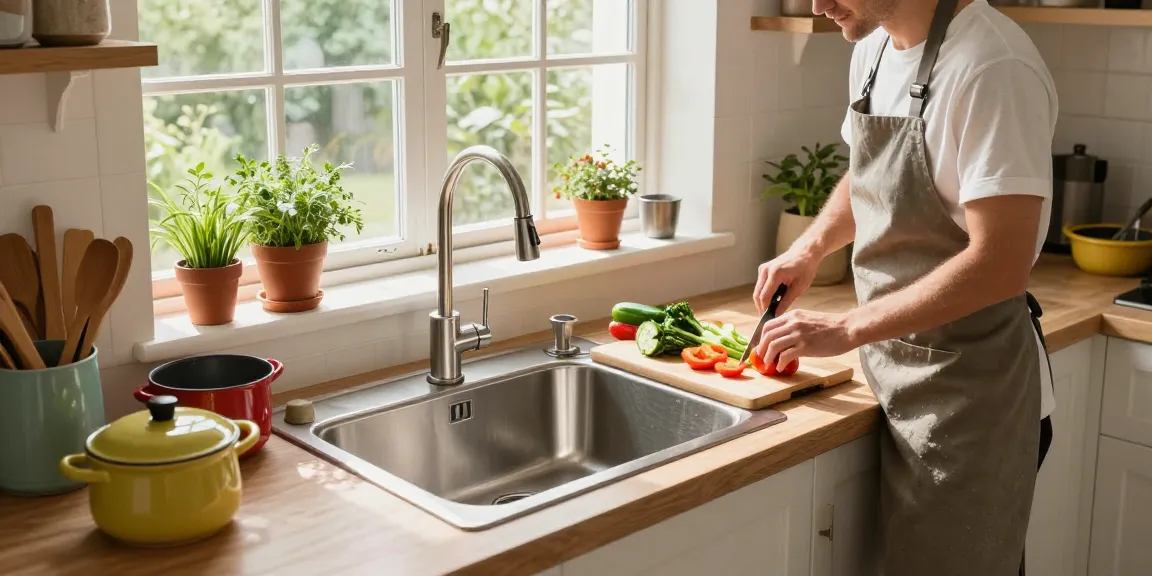
The Benefits of Choosing a Kitchen Sink in Stainless Steel

When it comes to outfitting your kitchen, selecting the right sink is as crucial as choosing your countertops or appliances. Among the myriad of choices available, the kitchen sink in stainless steel stands out for its combination of durability, aesthetic appeal, and functionality. This article delves into why stainless steel sinks have become a top choice for modern kitchens, examining their benefits, various types, installation tips, maintenance strategies, and future design trends.

Why Stainless Steel Is the Material of Choice

Stainless steel is revered in kitchen design for several compelling reasons. First, its resistance to rust, corrosion, and stains makes it ideal for the high-traffic areas of any kitchen. Unlike other materials, stainless steel does not chip or crack easily, which means it can endure the daily wear and tear of cooking, cleaning, and frequent use.

Another factor contributing to the popularity of stainless steel sinks is their sleek, modern look. They easily complement a variety of kitchen styles, from contemporary to industrial, adding an element of sophistication without overpowering other design features.

Durability and Longevity of Stainless Steel Sinks

One of the standout features of stainless steel sinks is their extraordinary durability. High-quality stainless steel is typically classified by its gauge, with lower numbers indicating thicker, more robust materials. A 16-gauge sink is an excellent choice for residential kitchens, as it balances weight and resilience, ensuring that it withstands not just the rigors of daily use but also potential accidental impacts.

Moreover, a well-maintained stainless steel sink can last for decades, offering excellent value compared to other materials that may require replacement sooner due to wear or damage.

Design Versatility: A Perfect Match for Any Kitchen Style

The versatility of stainless steel sinks extends beyond their durable nature. They are available in various designs and finishes, allowing homeowners to find the perfect match for their unique kitchen aesthetic. Whether you prefer a polished, mirror-like finish or a brushed, matte appearance, stainless steel sinks can enhance your kitchen’s overall look.

Furthermore, their neutral tones blend seamlessly with various countertops and cabinetry, making them a favored choice among interior designers and homeowners alike.

Types of Kitchen Sinks in Stainless Steel

Exploring Single vs. Double Bowl Sinks

One of the first decisions to make when selecting a stainless steel sink is whether to choose a single or a double bowl design. Single bowl sinks offer a large, uninterrupted space, making them ideal for washing larger pots and pans. They are a great fit for minimalist kitchens where simplicity is key.

On the other hand, double bowl sinks provide versatility, allowing for multitasking; for instance, one bowl can be used for washing dishes while the other can be used for food prep. This design suits busy kitchens where efficiency is essential.

Understanding Undermount, Drop-in, and Apron-Front Styles

Stainless steel sinks come in multiple installation styles. Undermount sinks are installed under the countertop, providing a seamless look that is easy to clean. Drop-in sinks, the traditional choice, rest on top of the counter and are straightforward to install.

Apron-front sinks, known for their distinctive front-facing design, are not only visually striking but also functional, making them popular in farmhouse-style kitchens. Each style has its benefits and can significantly impact the overall functionality and look of your kitchen.

Choosing the Right Size for Your Kitchen Space

The size of your stainless steel sink is crucial, not just for aesthetics but also for practicality. A standard kitchen sink typically ranges from 22 to 33 inches in width, but there are various sizes available to fit any kitchen layout. Before making a purchase, consider the available space in your kitchen to ensure the sink complements your design without overwhelming it.

Installation Tips for Stainless Steel Kitchen Sinks

Necessary Tools and Equipment for Installation

Installing a stainless steel sink can be a rewarding DIY project. However, having the right tools is essential for ensuring a smooth installation process. Key tools include a wrench, screwdriver, level, silicone sealant, and a plumbing kit. If you’re opting for an undermount sink, you’ll also need mounting clips and possibly a sink support.

Step-by-Step Installation Guide

Here’s a simplified step-by-step guide for installing your stainless steel kitchen sink:

  1. Preparation: Shut off water supply and disconnect the existing sink.
  2. Template Creation: If installing an undermount sink, outline the sink’s perimeter on the countertop.
  3. Cutting the Countertop: Carefully cut the opening in the countertop according to the template.
  4. Mounting the Sink: For undermount, attach mounting clips; for drop-in, place the sink into the hole.
  5. Seal and Connect: Apply silicone sealant and reconnect plumbing.
  6. Final Adjustments: Ensure the sink is level and operate the water supply to check for leaks.

Hiring a Professional vs. DIY Installation

While many homeowners feel confident in their ability to install a stainless steel sink, others may prefer the reliability of hiring a professional. Consider your skill level and the complexity of the installation before making a decision. Professional installation can ensure proper fitting and function, especially with advanced styles like undermounts or apron-front sinks.

Maintaining Your Stainless Steel Sink for Longevity

Best Practices for Cleaning and Care

To keep your stainless steel sink looking pristine, regular cleaning is essential. A simple solution of warm water and mild soap can effectively remove food particles and grease. For more stubborn stains, a mixture of baking soda and water works wonders without scratching the surface.

It’s crucial to avoid harsh chemicals and abrasive cleaners, as they can damage the sink’s finish. Instead, opt for specialized stainless steel cleaners that can enhance shine and offer protection against water spots.

Common Issues and How to Solve Them

Despite their durability, stainless steel sinks can occasionally encounter issues, such as scratches or dullness. Small scratches can often be buffed out using a soft cloth and a metal polish, while dullness can be restored with a gentle polish specifically designed for stainless steel.

Should you notice persistent stains or discoloration, consider consulting with a professional for deeper cleaning solutions.

Protective Accessories to Consider for Your Sink

To prolong the life of your stainless steel sink, consider investing in protective accessories like sink grids or mats. These items can prevent scratches and dents from pots and pans, while also providing a cushion for delicate items.

Additionally, sink strainers can help keep your plumbing clear by catching food particles, preventing clogs, and ensuring easy maintenance.

Future Trends in Kitchen Sink Designs for 2026

Innovative Materials and Technologies on the Horizon

As we move toward 2026, kitchen sink design is set to evolve with innovative materials such as composite sinks that combine the durability of stainless steel with the aesthetic appeal of other materials. Additionally, advancements in manufacturing technologies may introduce sinks with built-in features that enhance functionality while maintaining a sleek appearance.

Eco-Friendly Options: Sustainability in Kitchen Design

Consumers are increasingly focused on sustainability, leading to a rise in eco-friendly sink options. Manufacturers are exploring ways to use recycled materials in their production processes, providing an environmentally conscious choice for homeowners committed to responsible living.

Smart Features: Integrating Technology into Your Kitchen Sink

The integration of technology into kitchen design is a growing trend. Expect to see stainless steel sinks equipped with smart features, such as touchless faucets, built-in water filtration systems, and even sensors that help monitor water temperature. These innovations not only enhance convenience but also improve the kitchen’s overall functionality.

What are the advantages of a stainless steel kitchen sink?

Stainless steel sinks offer a combination of durability, aesthetic flexibility, and ease of maintenance, making them highly practical for any kitchen. Their resistance to stains, heat, and corrosion provides longevity and reliability.

How do I maintain a stainless steel sink?

Regular cleaning with mild soap and warm water, along with the use of protective mats or grids, can significantly extend the life of a stainless steel sink. Avoid abrasive cleaners to keep the sink’s surface unmarred.

Can I install a stainless steel sink myself?

Yes, with the right tools and a bit of DIY knowledge, many homeowners can install a stainless steel sink themselves. However, if unsure, hiring a professional can ensure a proper fit and finish.

What styles of stainless steel sinks are available?

Stainless steel sinks are available in a variety of styles, including single bowl, double bowl, undermount, drop-in, and apron-front. Each style caters to different kitchen needs and aesthetics.

Are stainless steel sinks prone to scratches?

While stainless steel sinks are relatively resistant to scratches, they are not entirely scratch-proof. Using protective accessories and avoiding harsh abrasive cleaners can help maintain their surface integrity.

Transform your bathroom with elegant showers au featuring sleek modern designs.

Elevate Your Bathroom Aesthetic with Elegant Showers au

Understanding Elegant Showers au

The bathroom is no longer just a functional space; it has transformed into a sanctuary of relaxation and elegance. One of the central elements in achieving this aesthetic is the shower. The concept of elegant showers au encompasses a variety of designs, features, and styles that enhance both the functionality and beauty of bathrooms. This comprehensive guide will delve into what makes a shower truly elegant, how you can integrate these styles into your own bathroom, and the ways to maintain and upgrade your shower for optimal experience.

What Makes Shower Designs Elegant?

Elegant shower designs are marked by several key characteristics that distinguish them from standard models. First and foremost, elegance is defined by simplicity combined with sophisticated details. Elements such as clean lines, harmonious proportions, and high-quality materials play vital roles. Additionally, the color palette is typically understated, featuring neutral tones or soft pastels that create a calming atmosphere. The inclusion of advanced technology, such as digital controls and efficient water-saving features, adds to the modern elegance.

Key Features of Elegant Showers au

When considering elegant showers au, it’s essential to identify the key features that elevate their design and function. Some notable characteristics include:

  • Frameless Glass Panels: These offer an open feel, making the bathroom appear larger and more airy while allowing natural light to flood the space.
  • Rainfall Showerheads: Mimicking the feeling of standing in a gentle rain, these showerheads provide a luxurious experience.
  • Customizable Lighting: Adjustable LED lighting can dramatically change the mood of your shower and bathroom.
  • Built-in Storage Solutions: Elegant designs often incorporate spaces for essentials, ensuring a sleek appearance without clutter.
  • High-end Finishes: The choice of materials, such as brushed brass, matte black fixtures, or ceramic tile, contributes significantly to the overall feel of elegance.

How Elegant Showers au Enhance Bathroom Appeal

The aesthetic appeal of elegant showers au goes beyond mere appearance; they can dramatically enhance the overall ambiance of your bathroom. A beautifully designed shower can become a focal point, drawing attention away from less appealing elements in the bathroom. Furthermore, the luxurious feel of an elegant shower creates a more enjoyable experience, transforming routine hygiene into a moment of indulgence. This heightened level of comfort and enjoyment can significantly increase the overall satisfaction with your home.

Choosing the Right Elegant Showers au

Selecting the right shower for your space involves a deep understanding of your bathroom’s unique characteristics and your personal style preferences. By considering certain factors, you can ensure that your elegant shower complements your bathroom both functionally and aesthetically.

Assessing Your Bathroom Space

The first step in choosing an elegant shower involves assessing the layout and dimensions of your bathroom. Measure the space available for your shower, taking into account existing plumbing, walls, and accessibility needs. A common misconception is that small bathrooms cannot accommodate elegant features. However, with thoughtful planning, stylish and space-saving designs can create a visually appealing atmosphere in compact areas.

Material Options for Elegant Showers au

Materials significantly influence the aesthetic and functional qualities of elegant showers au. Common materials and their benefits include:

  • Glass: Ideal for a modern look, it is easy to clean and visually expands space.
  • Natural Stone: Provides a timeless elegance but requires upkeep to prevent staining and mold.
  • Acrylic: A cost-effective option with the appearance of high-end materials but lighter and easier to install.
  • Tile: Offers endless design possibilities but can be labor-intensive to install and maintain.

Styles of Elegant Showers au: Which One is Right for You?

With a variety of styles available, deciding on the right one for your bathroom requires evaluating current decor and personal preferences. Some popular styles include:

  • Contemporary: Minimalistic with clean lines, using modern materials like glass and polished metals.
  • Rustic: Earthy materials like stone and wood create a warm and inviting atmosphere.
  • Vintage: Features classic finishes and intricate detailing that add historical charm.
  • Industrial: Characterized by raw materials, exposed plumbing, and a modern yet gritty vibe.

Installation Considerations for Elegant Showers au

Installation is a crucial phase in bringing your vision of an elegant shower to life. A successful installation will depend on careful planning, selection of appropriate tools, and an understanding of whether to engage professionals or tackle the project yourself.

Planning Your Shower Layout

Before installation, it is vital to create a detailed layout. Begin by sketching your bathroom and determining where the shower will fit, considering factors such as access to plumbing and placement of doors. Ensure the design complies with local building codes, which may affect measurements and drainage requirements.

Tools Needed for Installation

Whether undertaking a DIY installation or working with professionals, certain tools are necessary for a successful project, including:

  • Pliers and wrenches
  • Drills and screwdrivers
  • Level and measuring tape
  • Tile cutter (if using tiles)
  • Saw for cutting any framing materials

Professional vs. DIY Installation of Elegant Showers au

Choosing between professional installation and undertaking the project yourself depends on several factors, including complexity, your DIY skill level, and the time you have available. While professionals bring expertise and may offer warranties, DIY installations can save money and provide personal satisfaction. Consider consulting with professionals for initial advice while carrying out as much as you feel comfortable implementing.

Maintaining Elegant Showers au

To preserve the beauty and functionality of elegant showers au, regular maintenance is essential. With proper care, you can prevent costly repairs while ensuring your sanctuary remains a joy to use.

Cleaning Tips for Longevity

Regular cleaning is vital to maintaining the aesthetics and functionality of shower fixtures. Use non-abrasive cleaners and avoid harsh chemicals that can damage surfaces. For glass, a mixture of vinegar and water effectively removes soap scum without scratching. Don’t forget to clean showerheads and faucets regularly to prevent mineral buildup.

Common Issues with Elegant Showers au

Over time, even the most elegant showers may experience common issues such as leaks, mold growth, or clogged drains. Address leaks promptly, as they can lead to water damage. Utilize caulk to prevent water from seeping through joints, and regularly inspect seals for wear. Employ moisture control strategies to mitigate mold growth.

Upgrades for Enhanced Functionality

Enhancing your shower can keep it current and functional. Consider adding features such as detachable showerheads for increased versatility, built-in shelving for added storage, or water-saving fixtures to reduce consumption. Smart technology that allows you to control shower settings via smartphone can also offer additional convenience.

Trends in Elegant Showers au

Staying informed about trends in shower design can help you customize your space in innovative ways. Understanding the evolving market can lead to decisions that enhance both utility and style.

Latest Design Innovations

Recent design trends favor integrating sleek lines with bold accents. Innovations in tile design, such as large-format tiles or patterned mosaics, have gained popularity, promoting artistic expression in shower spaces. Additionally, multi-sensory options, such as integrated sound systems or aromatherapy, can create a spa-like experience within the home.

Eco-Friendly Shower Solutions

Many homeowners are now opting for eco-friendly shower solutions that conserve water and energy. Low-flow showerheads can effectively reduce water consumption without compromising pressure. Installing systems that recycle water for reuse can significantly lower water bills while being kind to the environment.

Smart Features in Elegant Showers au

The rise of smart technology has also made its way into shower design. Features such as touchless controls, automated temperature settings, and app-controlled settings provide users with enhanced convenience and luxury. As technology continues to advance, these features will likely become increasingly commonplace in elegant showers.

FAQs

What is an elegant shower?

An elegant shower is a thoughtfully designed shower space that combines aesthetics and functionality, showcasing high-quality materials and advanced features.

How can I maintain my elegant shower?

Regular cleaning with non-abrasive products, prompt leak repairs, and moisture control practices can prolong the life and beauty of your elegant shower.

What materials are best for elegant showers au?

Glass, natural stone, and high-quality acrylic are popular choices for elegant showers, offering a mix of beauty and practicality.

Can I install an elegant shower myself?

Yes, but it requires careful planning, the right tools, and some DIY skills. If unsure, consider consulting a professional for advice.

What are the latest trends in shower design?

Current trends emphasize eco-friendliness, smart technology, and innovative materials like large-format tiles for a modern and stylish appearance.

Erleben Sie die elegante sonni Duschkabine in einem stilvollen Badezimmer mit modernem Design.

Die beste Wahl für Ihre sonni Duschkabine: Design, Vorteile und Installation

Was ist eine sonni Duschkabine?

Definition und Merkmale

Eine sonni Duschkabine ist eine geschlossene Duschlösung, die in modernen Badezimmern weit verbreitet ist. Diese Kabinen bieten eine elegante und funktionale Alternative zu herkömmlichen Duschvorhängen oder -wannen. Typische Merkmale einer sonni Duschkabine umfassen transparente oder halbtransparente Wände, die aus Sicherheitsglas bestehen, sowie unterschiedliche Türmechanismen, die den Zugang zur Dusche erleichtern. Ein zentrales Element ist das durchdachte Design, das sowohl die Ästhetik als auch die Benutzerfreundlichkeit in den Vordergrund stellt.

Vorteile einer Duschkabine

Die Vorzüge einer sonni Duschkabine sind vielfältig. Erstens optimieren sie den verfügbaren Raum, da sie in der Regel kompakter sind als Badewannen. Zweitens erleichtern sie die Reinigung, da sie keine schwer zugänglichen Ecken aufweisen, wie sie oft bei Badewannen zu finden sind. Drittens bieten viele Duschkabinen ein gemeinsames Erlebnis für Paare oder Familien und fördern somit angenehme Momente im Badezimmer. Schließlich sind sie eine umweltfreundliche Wahl, da sie weniger Wasser verbrauchen als ein Vollbad.

Materialien und Designoptionen

Bei der Auswahl einer sonni Duschkabine stehen Ihnen verschiedene Materialien und Designs zur Verfügung, die sowohl funktionale als auch ästhetische Ansprüche erfüllen. Typische Materialien sind Hochglanzkunststoffe, Stahl und Glas. Insbesondere Glas ist dank seiner Transparenz und seiner eleganten Optik sehr beliebt. Zudem sind diverse Designoptionen verfügbar, wie z.B. geräumige Eckduschen oder luxuriöse Walk-in-Lösungen, die jedem Badezimmer den entsprechenden Charakter verleihen.

Gestaltungsmöglichkeiten für die sonni Duschkabine

Farben und Oberflächen

Die Farben und Oberflächen von sonni Duschkabinen sind entscheidend für die Gesamtästhetik Ihres Badezimmers. Häufig kommen neutrale Töne wie Weiß, Grau oder Schwarz zum Einsatz, die sich leicht in verschiedene Einrichtungsgestile integrieren lassen. Darüber hinaus können Akzentfarben oder spezielle Oberflächenstrukturen, wie matte oder glänzende Oberflächen, eingesetzt werden, um einen individuellen Look zu kreieren. Designer empfehlen, die Farben an die restliche Badezimmerausstattung anzupassen, um harmonische Übergänge zu schaffen.

Raumgestaltung und Integration

Die Integration einer sonni Duschkabine in das Badezimmerdesign erfordert sorgfältige Planung. Berücksichtigen Sie dabei die Anordnung der Sanitäranlagen, die Beleuchtung sowie den verfügbaren Platz. Ein trendiger Ansatz ist die Wahl einer Duschkabine, die nahtlos in den Boden eingelassen wird – dies schafft einen modernen, minimalistischen Look. Alternativ können Sie eine Duschabtrennung wählen, die optisch klar zu einem Badewannenbereich abgrenzt.

Beleuchtungsideen für Duschkabinen

Die Beleuchtung spielt eine wesentliche Rolle in der Gestaltung einer sonni Duschkabine. Indirekte Beleuchtung, wie LED-Streifen entlang der Kanten der Kabine, kann eine sanfte und entspannende Atmosphäre schaffen. Alternativ bieten Einbauleuchten oder Spotlights eine gezielte Beleuchtung, die die Duschoberflächen optimal zur Geltung bringt. Das Kombinieren von warmen und kalten Lichtquellen kann helfen, verschiedene Stimmungen im Badezimmer zu erzeugen.

Installation der sonni Duschkabine

Vorbereitung des Installationsbereichs

Bevor Sie mit der Installation Ihrer sonni Duschkabine beginnen, ist eine gründliche Vorbereitung des Installationsbereichs unerlässlich. Messen Sie den verfügbaren Raum genau und stellen Sie sicher, dass alle notwendigen Wasser- und Abflussanschlüsse vorhanden sind. Reinigen Sie die Fläche gründlich und stellen Sie sicher, dass der Untergrund stabil ist. Es empfiehlt sich auch, alle notwendigen Werkzeuge und Materialien bereitzustellen, bevor Sie mit dem eigentlichen Prozess beginnen.

Schritt-für-Schritt-Anleitung zur Installation

  1. Beginnen Sie mit dem Aufstellen der Wände der Duschkabine, indem Sie die vorgegebene Anleitung befolgen.
  2. Verankern Sie die Wände sicher im Boden gemäß den spezifischen Anforderungen.
  3. Installieren Sie die Duschtür(en) und prüfen Sie deren Funktion.
  4. Verbinden Sie die Wasserleitungen mit dem Duschkopf und der Armatur.
  5. Überprüfen Sie die Abdichtung der Fugen, um Wasserschäden zu vermeiden.

Häufige Fehler und wie man sie vermeidet

Bei der Installation einer sonni Duschkabine können häufig Fehler auftreten, die leicht vermieden werden können. Ein häufiger Fehler ist ungenaues Messen der Installationsfläche. Deshalb ist präzises Arbeiten unerlässlich. Zudem kann die unsachgemäße Abdichtung zu Wasserschäden führen – verwenden Sie für die Fugen daher hochwertige Dichtstoffe. Auch das richtige Anbringen der Tür ist entscheidend, um späteres Verkippen oder undichte Bereiche zu vermeiden.

Pflege und Wartung der sonni Duschkabine

Reinigungsanleitungen

Um die Langlebigkeit Ihrer sonni Duschkabine sicherzustellen, ist regelmäßige Reinigung erforderlich. Verwenden Sie milde Reinigungsmittel ohne aggressive Chemikalien, um die Oberflächen zu schonen. Ein Mikrofasertuch eignet sich ideal, um Kalkablagerungen zu entfernen. Achten Sie besonders auf die Ecken und Fugen, da hier oft Schmutz ansammelt. Nach der Reinigung sollten Sie die Kabine mit klarem Wasser abspülen und trocknen, um unschöne Wasserflecken zu vermeiden.

Tipps zur vorbeugenden Wartung

Eine regelmäßige Wartung kann dazu beitragen, dass Ihre sonni Duschkabine in gutem Zustand bleibt. Prüfen Sie regelmäßig die Dichtungen und ersetzen Sie sie bei Bedarf, um Undichtigkeiten vorzubeugen. Zudem sollten Sie nach der Nutzung die Duschkraft abziehen, um Wasseransammlungen zu vermeiden. Planen Sie einmal im Monat eine gründliche Reinigung ein, um Ablagerungen frühzeitig zu entfernen.

Produkte zur Pflege und Reinigung

Es gibt eine Vielzahl von Reinigungsprodukten, die speziell für die Pflege von Duschkabinen entwickelt wurden. Wählen Sie Produkte, die auf die verwendeten Materialien abgestimmt sind. Für Glasflächen sind spezielle Glasreiniger geeignet, während Keramikoberflächen oft mit Allzweckreinigern gesäubert werden können. Darüber hinaus können natürliche Reinigungsmittel wie Essig oder Zitronensaft effektiv gegen Kalkflecken eingesetzt werden.

Häufige Fragen zur sonni Duschkabine

Wie viel kostet eine sonni Duschkabine?

Die Kosten variieren je nach Material und Design, beginnen jedoch oft bei 500 Euro.

Welche Größen sind erhältlich?

sonni Duschkabinen sind in diversen Größen erhältlich, um jedem Raum gerecht zu werden.

Kann ich die Duschkabine selbst installieren?

Ja, mit den richtigen Anleitungen und Werkzeugen ist eine Eigeninstallation möglich.

Wie reinige ich meine Duschkabine effektiv?

Verwenden Sie milde Reinigungsmittel und weiche Tücher, um Kratzer zu vermeiden.

Was sind die Vorteile einer Duschkabine im Vergleich zu einer Badewanne?

Duschkabinen sind platzsparender, einfacher zu reinigen und oft effizienter im Wasserverbrauch.

Evaluate spray foam removal cost in an attic by a contractor, highlighting tools and safety equipment.

Understanding the Real Cost of Spray Foam Removal: A Comprehensive Guide

1. Introduction to Spray Foam Removal Cost

Spray foam insulation has become a popular choice for homeowners seeking energy efficiency and improved comfort. However, the need for spray foam removal cost can arise for various reasons—from property renovations to health concerns. Understanding these costs is vital for anyone contemplating the removal of existing spray foam insulation. This guide offers a detailed exploration of what spray foam is, reasons for its removal, and the overall costs involved.

1.1 What is Spray Foam?

Spray foam insulation consists of a mixture of isocyanate and polyol resin, which, when sprayed, expands and hardens, forming an effective thermal barrier. It is used in both residential and commercial applications due to its excellent insulating properties and ability to seal air leaks. The two common types of spray foam are open-cell and closed-cell, each with different properties and applications.

1.2 Why Consider Removal?

While spray foam offers numerous benefits, certain circumstances might prompt its removal. Common reasons include:

  • Damage or degradation: Exposure to moisture or chemicals may cause spray foam to deteriorate, compromising its effectiveness.
  • Health concerns: Some individuals may experience allergic reactions or respiratory issues related to the chemicals in spray foam.
  • Property renovations: Changes in the structure or use of a space might necessitate the removal of existing insulation.
  • Improving energy efficiency: Installing more advanced or eco-friendly insulation could require removing outdated spray foam.

1.3 Overview of Costs Involved

The cost of removing spray foam insulation varies widely depending on factors like the type of foam, the size of the area, and labor costs in your region. A typical removal job can range from a few hundred to several thousand dollars. Accurate estimates should account for labor, materials, equipment rental, and disposal fees.

2. Factors Influencing Spray Foam Removal Cost

Understanding the nuances that affect spray foam removal costs can help homeowners make more informed decisions about their projects.

2.1 Type of Foam Used

The cost of removal is significantly influenced by the type of spray foam insulation installed. Open-cell foam tends to be less expensive to remove than closed-cell foam due to its lighter structure and ease of access. Closed-cell foam, being denser and more adhesive, requires specialized equipment and possibly more labor hours, thus increasing costs.

2.2 Size of the Project

As with most renovation projects, size matters. Larger areas will naturally incur higher costs due to extended labor duration and increased disposal expenses. When estimating costs, take precise measurements of the area requiring removal, as this affects both time and resources needed for the project.

2.3 Accessibility of the Space

Accessibility plays a crucial role in the overall cost of spray foam removal. Areas that are hard to reach—such as attics, crawl spaces, or behind walls—can complicate the removal process, requiring more effort and potentially specialized equipment. This added complexity increases labor costs and can affect the total pricing of the removal service.

3. Estimating the Spray Foam Removal Cost

Before you proceed, understanding how to estimate the costs accurately is essential for avoiding unexpected financial surprises.

3.1 Average Pricing Models

On average, homeowners can expect spray foam removal costs to range between $1.50 to $3.00 per square foot for open-cell foam and up to $4.00 per square foot for closed-cell foam. These figures vary by location and complexity of the job, so it’s advisable to gather multiple estimates from professionals to get a clearer picture of expected costs.

3.2 Cost Breakdown of Services

The total fee for spray foam removal includes several components:

  • Initial assessment: Depending on the service provider, a consultation or assessment fee may be charged.
  • Labor: This will likely comprise a significant portion of the costs. Expect to pay between $50 and $100 per hour, depending on labor rates in your region.
  • Materials: This can include protective gear for workers, disposal bags, and any other materials needed to complete the removal.
  • Disposal fees: Local regulations may require specific disposal methods for hazardous materials like spray foam, which can add to costs.

3.3 Hidden Costs to Consider

Several hidden costs can impact the final price of spray foam removal:

  • Environmental regulations: Compliance with local disposal regulations may add costs, especially in areas with strict environmental policies.
  • Unexpected damage: During the removal process, it’s possible to discover underlying issues such as mold or structural damage, which can increase project costs.
  • Property restoration: After removal, surface restoration may be necessary, particularly if the foam was installed in walls or ceilings.

4. When to Hire Professionals for Spray Foam Removal

Determining when to call in the experts can save time and ensure safety during the removal process.

4.1 Signs You Need Expert Help

There are specific indicators that suggest professional help is necessary for spray foam removal:

  • Extensive coverage: If the foam layer is thick or widely distributed, removing it without professional help can be difficult.
  • Health symptoms: If you or your family members exhibit health issues relating to the insulating material, immediate professional assessment is advisable.
  • Structural concerns: If removal will involve navigating around electrical or plumbing systems, experts should handle the job.

4.2 Questions to Ask Potential Contractors

To ensure you hire the right contractor for spray foam removal, consider asking the following questions:

  • What is your experience with spray foam removal? Inquire about their background and previous projects.
  • Can you provide references or testimonials? Speak with former clients about their satisfaction with the service.
  • What safety measures do you implement? Understanding their approach to safety will help gauge their professionalism.
  • What is the estimated timeline for completion? Getting a clear timeline can help you plan better.
  • Will there be additional costs? Always clarify cost expectations upfront to avoid surprises.

4.3 Weighing DIY vs Professional Services

While DIY removal might seem cost-effective initially, it often leads to unforeseen complications such as inadequate removal, damage to your property, or potential health risks. Conversely, hiring professionals may incur higher upfront costs but can provide peace of mind, efficiency, and safety in the long run. Assess your own capabilities and the risks involved before deciding which route to take.

5. FAQs About Spray Foam Removal Cost

5.1 What is the average cost for spray foam removal?

The average cost for spray foam removal typically ranges between $1.50 to $4.00 per square foot, depending on the foam type, project size, and other factors.

5.2 How long does the removal process take?

The removal process can take anywhere from a few hours to several days, largely influenced by the project size and accessibility of the area where the foam is installed.

5.3 Is spray foam removal safe for my home?

Yes, professional spray foam removal is safe when conducted by experienced contractors who follow proper safety protocols and local environmental regulations.

5.4 Can I do the removal myself?

While DIY removal is possible, it carries risks such as safety hazards, inadequate removal, and potential damage to your home. Hiring professionals is usually more advisable.

5.5 What preparations are needed before removal?

Before removal, clear the space of furniture and protect your flooring. Ensure that the area is well-ventilated and that the contractor has access to electricity and water as needed.

Elegant showers au featured in a luxurious modern bathroom with natural lighting.

Transform Your Space with Elegant Showers au: Design Ideas and Inspirations

1. Understanding the Elegance of Showers

In today’s world of interior design, the shower is often seen as a sanctuary—a retreat from the stress of everyday life. For many homeowners, the shower space symbolizes relaxation and rejuvenation. Thus, embracing the concept of elegant showers au can elevate not just the aesthetic of your bathroom, but the entire bathing experience.

1.1 The Importance of Shower Design

The design of a shower can significantly influence how we feel when using it. A thoughtfully designed shower area can promote tranquility and comfort. Whether it’s a sleek, modern design or a rustic, spa-like atmosphere, the right elements go a long way. The visual appeal enhances our mood and encourages longer, more soothing bathing experiences.

1.2 Key Features of Elegant Showers au

Elegant showers au often incorporate several key features that distinguish them from ordinary shower designs. These may include:

  • High-Quality Fixtures: Investment in premium materials ensures durability while adding a touch of luxury.
  • Innovative Showerheads: Options such as rain showers or handheld models provide versatility and enhance functionality.
  • Lighting: Integrated lighting options, such as LED strips, can create a serene ambiance.
  • Glass Enclosures: Frameless glass not only looks refined but also helps to make small spaces appear larger.

1.3 Creating a Relaxing Environment

To truly benefit from an elegant shower experience, creating a soothing environment is key. Incorporating elements such as soft colors, calming scents, and natural materials can enhance this ambiance. Consider adding water-resistant plants or aromatherapy diffusers that complement the design while promoting relaxation and wellness.

2. Choosing the Right Materials for Elegance

2.1 Popular Materials for Elegant Showers au

The materials used in shower construction can create a distinguishing look and feel. Common choices include:

  • Marble: Known for its luxury appeal, marble offers an elegant surface that remains timeless.
  • Porcelain Tiles: These provide durability while mimicking natural stones.
  • Glass: Used for both walls and doors, glass can help create a more open and spacious feel.
  • Natural Stone: Options like slate and travertine add texture and unique aesthetics.

2.2 Impact of Texture and Color

Texture and color selection are vital components in shower design. Light colors can create a sense of airiness, while darker shades evoke warmth and comfort. Textured tiles can add interest, drawing the eye and preventing the space from feeling flat. Balancing these aspects crafts a visually engaging and sophisticated shower environment.

2.3 Sustainable Material Choices

Sustainability is increasingly important in today’s design choices. Opting for eco-friendly materials not only benefits the environment but can also add unique elements to the shower space. For example, recycled tiles or sustainably sourced woods often come with distinct characteristics that enhance visual interest while supporting green design principles.

3. Innovative Shower Designs and Trends

3.1 Current Trends in Shower Designs

The evolution of bathroom design has led to many innovative shower trends. Open-concept showers, which eliminate traditional barriers, are gaining popularity for their ability to create seamless transitions between spaces. Likewise, incorporating technology, such as digital controls and smart water management systems, adds a modern touch enhanced by user-friendly experiences.

3.2 Customizable Shower Features

One of the most appealing aspects of designing a shower is the ability to customize features to suit individual needs. From adjustable showerheads to built-in seating or storage solutions, innovation empowers homeowners to create a space that reflects personal style and enhances usability.

3.3 Importance of Functionality

While aesthetics are important, functionality should never be overlooked. A well-designed shower ensures ease of maintenance and efficient water usage. Features such as non-slip flooring and ergonomic installations not only provide comfort but enhance safety, making the shower suitable for all family members.

4. Maximizing Space in Small Bathrooms

4.1 Elegant Showers au for Compact Spaces

In smaller bathrooms, creating an elegant shower space can be challenging yet rewarding. Corner showers take up less room while maintaining functionality. Sliding doors can reduce the space required for opening and closing, adding to the movement efficiency of compact designs.

4.2 Smart Storage Solutions

Effective storage solutions are vital for maintaining an uncluttered and elegant shower experience. Built-in shelving and recessed niches can store essentials while preserving visual space. Additionally, vertical storage ideas help to maximize wall space, offering a solution for smaller areas.

4.3 Utilizing Light for Space Enhancement

Light plays a crucial role in making small bathrooms feel larger. Natural light is the best option, but when that isn’t feasible, strategically placed artificial lighting can mimic its effect. Bright, layered lighting can help illuminate different areas while providing an airy, spacious feel.

5. Maintenance Tips for Elegant Showers au

5.1 Cleaning and Care Guidelines

To maintain the elegance of your shower, regular cleaning is essential. Gentle, non-abrasive cleaners should be used to protect surfaces while removing soap scum and build-up. It’s also recommended to wipe down glass doors regularly to prevent hard water stains and keep the area gleaming.

5.2 Preventive Measures for Longevity

Several preventive measures can extend the life of your elegant shower. For instance, installing water softeners can reduce the mineral deposits that cause staining. Additionally, sealing grout lines and seams can protect against mold and mildew, maintaining both cleanliness and elegance.

5.3 Periodic Upgrades to Maintain Elegance

Periodically upgrading fixtures and features can refresh your shower’s appearance. Consider replacing dated showerheads or knobs with modern alternatives. Upgrading lighting or refreshing colors can rejuvenate the overall look without a complete renovation, making it an effective way to maintain the elegance of your bathroom.

Frequently Asked Questions

1. What are the key elements of an elegant shower design?

Key elements include high-quality fixtures, innovative showerheads, glass enclosures, and effective lighting to create an inviting atmosphere.

2. How can I maximize space in a small bathroom for a shower?

Utilize corner showers, sliding doors, and built-in storage options, and focus on maximizing natural and artificial light for an open feel.

3. What maintenance steps should I take for my shower?

Regular cleaning with non-abrasive cleaners, sealing grout lines, and installing water softeners will help maintain your shower’s elegance.

4. Are there sustainable options for shower materials?

Yes, options like recycled tiles and sustainably sourced woods are available, creating a unique look while supporting eco-friendly choices.

5. Can technology enhance my shower experience?

Absolutely! Incorporating digital controls, smart water management, and innovative features enhances usability and comfort in modern showers.

Showcase of kitchen and bathroom renovation with modern design elements, bright lighting, and stylish fixtures.

Maximizing Space and Style in Your Kitchen and Bathroom Renovation

Understanding the Basics of Kitchen and Bathroom Renovation

What is Kitchen and Bathroom Renovation?

Kitchen and bathroom renovation involves modernizing and improving these essential spaces in your home. It can encompass a wide range of changes, from installing new fixtures and appliances to redesigning the layout to better meet your needs. The goal of any renovation project is to enhance functionality while infusing style. A well-executed kitchen and bathroom renovation can transform these areas into more efficient and appealing spaces.

Key Elements to Consider

When diving into a renovation project, several key elements must be taken into account:

  • Layout: Reassessing the layout can significantly improve functionality. For kitchens, the work triangle (the distance between the stove, sink, and refrigerator) is a fundamental concept.
  • Storage: Increased storage solutions are critical, especially in bathrooms and kitchens, where clutter can accumulate quickly.
  • Lighting: Effective lighting strategies can enhance both aesthetics and functionality, transforming the ambience of the space.
  • Materials: Choosing durable materials that suit your design style impacts both the longevity and the visual appeal of the space.

Common Mistakes to Avoid

While renovating can be exciting, many pitfalls can derail your project. Here are some common mistakes to avoid:

  • Poor Planning: Failing to outline a clear plan can lead to costly changes mid-project.
  • Neglecting Budget: Underestimating your budget is a frequent error that can leave projects half-finished or create financial strain.
  • DIY Underestimation: While DIY projects can be rewarding, not every task is suitable for amateur intervention.
  • Ignoring Building Codes: Not adhering to local building regulations can result in fines and unsafe conditions.

Planning Your Kitchen and Bathroom Renovation

Setting a Realistic Budget

Budgeting is fundamental in renovation projects. Begin by researching costs associated with your intended changes. Allocate funds for materials, labor, design consultations, and unexpected expenses that may arise. It’s advisable to set aside an extra 10-20% of your budget as a contingency fund. Not only does this prepare you for surprises, but it also helps keep your project on track financially.

Choosing Design Styles and Themes

Your renovation should reflect your taste and the overall style of your home. Popular design styles include:

  • Modern: Defined by clean lines, neutral colors, and minimalistic features.
  • Traditional: Featuring classic elements like ornate cabinetry and vintage fixtures.
  • Industrial: Characterized by raw materials, exposed pipes, and a rustic aesthetic.
  • Rustic: This style embraces natural materials and warmth through earthy color palettes.

Choose a style that resonates with you while considering how it fits within your existing home interior.

The Importance of Professional Consultation

Engaging professionals such as designers or contractors can significantly impact the success of your renovation. They can provide insights you may not have considered, suggest optimal layouts, and help source quality materials and labor. Consulting an expert ensures compliance with local regulations, safety standards, and best construction practices, ultimately saving time and budget in the long run.

Essential Features for Modern Kitchen and Bathroom Renovation

Smart Storage Solutions

Effective storage is crucial in both kitchens and bathrooms due to limited space. Invest in cabinetry that maximizes vertical space. Features such as pull-out drawers, lazy Susans, and built-in organizers can transform chaotic areas into organized, functional spaces. In bathrooms, consider vertical shelving and medicine cabinets that utilize wall space efficiently.

Energy-Efficient Appliances

Incorporating energy-efficient appliances in your renovation can reduce utility bills and benefit the environment. Look for products with the ENERGY STAR label, which signifies that they meet stringent energy efficiency guidelines. Not only do these appliances save energy, but many also come with advanced features that enhance functionality and convenience.

Trendy Fixtures and Finishes

Choosing trendy fixtures and finishes can modernize your kitchen and bathroom. In kitchens, consider mixing metals, such as a brass faucet paired with stainless steel appliances for a contemporary twist. For bathrooms, opt for chic vanities with vessel sinks or unique showerheads that add visual interest and a sense of luxury.

Executing Your Kitchen and Bathroom Renovation

Step-by-Step Renovation Process

A structured renovation process helps streamline the project. Here’s a basic outline:

  1. Planning: Finalize your design, budget, and timeline.
  2. Demolition: Bust out old fixtures safely, particularly if you’re altering layouts.
  3. Plumbing and Electrical: Ensure all installations meet safety codes prior to closing walls.
  4. Install: Begin with cabinets, countertops, and large fixtures before finalizing with smaller details.
  5. Finishing Touches: Paint walls, install backsplash, and complete decorative elements.

Managing Contractors and Suppliers

Effectively communicating with contractors and suppliers is critical. Maintain regular check-ins to ensure everyone is aligned with the renovation goals. Utilizing project management tools can facilitate task assignment and update tracking, helping avoid misunderstandings and missed deadlines.

Staying on Schedule and Within Budget

Adhering to your timeline and budget requires discipline. Use project milestones to maintain momentum throughout the renovation. Track expenditures diligently and adjust spending as required. If delays arise, address them promptly to prevent cascading effects, impacting your schedule and financial plan.

Post-Renovation Considerations

Maintaining Your Renovated Spaces

Once your kitchen and bathroom renovation is complete, ongoing maintenance is essential to preserve their beauty and functionality. Regular cleaning and care of appliances, surfaces, and fixtures will prolong their lifespan. Establish a cleaning schedule that aligns with the material requirements, ensuring that everything remains in pristine condition.

Enhancing Home Value with Renovations

Well-planned renovations significantly enhance your home’s value. Buyers often prioritize updated kitchens and bathrooms. Return on investment (ROI) for these renovations can be considerable, often recouping a significant portion of the initial costs compared to other home improvements. Ensure your spaces are not only stylish but also functional to attract potential buyers in the future.

Feedback and Adjustment for Future Projects

Take note of the successes and challenges experienced throughout your renovation journey. Gathering feedback from family members on the functionality and aesthetics of the new spaces can inform future projects. Be prepared to make adjustments if any aspects do not meet your expectations, ensuring that your home truly reflects your lifestyle and tastes.

FAQs About Kitchen and Bathroom Renovation

How long does a typical kitchen and bathroom renovation take?

The timeline can vary but generally lasts from a few weeks to a few months, depending on the complexity of the project and the scope of work involved.

What are the most popular kitchen design styles?

Popular styles include modern, farmhouse, and minimalist design. Each reflects different aesthetics and functionality suited to various preferences.

How can I save money on my renovation?

Consider DIY for minor tasks, shop around for materials, and strategize your project to minimize labor costs while ensuring quality work.

What should I prioritize in a bathroom renovation?

Focus on functionality such as efficient layout, quality fixtures, and good lighting. These aspects significantly enhance the overall appeal and user experience.

Is professional help necessary for kitchen and bathroom renovations?

While some projects can be DIY, professional assistance is beneficial for layout design, plumbing, and electrical work to ensure compliance and quality.

Showcasing colonial home construction with elegant architecture and lush surroundings.

Mastering Colonial Home Construction: Timeless Techniques and Design Insights

Understanding Colonial Home Construction

Colonial home construction represents a rich tapestry of architectural history that combines form and function, heritage and modernity. These homes, often distinguished by their elegant symmetry and classic styling, offer a glimpse into the past while fulfilling contemporary needs. For those embarking on a journey to build or renovate in this timeless style, understanding the core aspects of colonial home construction is essential.

The Roots of Colonial Architecture

Originally inspired by European designs, particularly from England and the Netherlands, colonial architecture emerged during the 17th and 18th centuries in America. The style evolved based on the climate, available materials, and cultural influences of various regions. Early colonial homes reflected local conditions while incorporating features from the settlers’ homelands. Notable variations include Georgian, Federal, and Cape Cod styles, each with distinctive features that resonate even today.

Common Design Features

Colonial homes showcase elements such as:

  • Symmetry: Often characterized by balanced proportions, marked by a central front door flanked by evenly spaced windows.
  • Materials: Traditional materials such as wood, brick, and stone, chosen for durability and aesthetic appeal.
  • Gabled Roofs: Steeply pitched roofs not only add to the visual interest but help with snow and rain runoff.
  • Chimneys: Typically large and centrally located, reflecting the homes’ original use of fireplaces for heat.
  • Porches: Welcoming front porches that extend the living space outdoors.

Benefits of Colonial Style Homes

Choosing a colonial design has numerous advantages:

  • Timeless Aesthetics: Colonial homes embody classic beauty that appeals to many, ensuring lasting desirability.
  • Efficient Space Utilization: The layout emphasizes spacious rooms and functional separation, promoting family interaction and privacy.
  • Strong Resale Value: The enduring popularity of colonial homes often ensures strong market performance over time.
  • Adaptability: Their flexible designs allow easy integration with modern amenities.

Planning Your Colonial Home Construction

The planning phase is crucial for a successful colonial home construction project. Here are key considerations to ensure a smooth process.

Choosing the Right Location

Location significantly influences your construction experience and the home’s eventual value. Factors such as accessibility, natural surroundings, and proximity to schools or shopping centers should guide your decision. Look for neighborhoods with historical significance or architectural harmony for a more authentic colonial feel.

Designing Functional Spaces

While maintaining traditional beauty, modern homeowners aspire for practicality. Open-concept kitchens that flow into dining areas can enhance social interactions, while dedicated offices can cater to remote work needs. Collaborating with an architect experienced in colonial designs can help strike a balance between original aesthetics and contemporary functionality.

Budgeting Your Construction Costs

A well-structured budget will serve as your roadmap throughout the construction process. Begin with a comprehensive understanding of the costs involved, which may include:

  • Permitting and site preparation
  • Labor costs and contractor fees
  • Materials, with specific attention to how traditional materials may impact pricing
  • Interior finishes and landscaping

Contingency funds should also be built into your budget to accommodate unexpected expenses that often arise during construction.

Materials Utilized in Colonial Home Construction

Material selection plays a vital role in achieving the authentic charm of colonial homes. Understanding your options can help enhance both the aesthetic and functional qualities of your new home.

Traditional vs. Modern Materials

Colonial homes traditionally utilize local materials, which can add character and warmth. Classic choices include:

  • Brick: Offers durability and a classic appearance; commonly used for facades.
  • Wood: A versatile option for beams, framework, and decorative details like moldings.
  • Stone: Known for its timelessness, used in foundations and specific architectural elements.

Modern advancements, such as engineered wood and composite materials, can also provide durability and sustainability, extending the life and appeal of colonial designs.

Integrating Sustainable Practices

Building a colonial home does not have to conflict with sustainable practices. Integrating green technologies can enhance both energy efficiency and comfort. Incorporating items such as:

  • Solar panels discreetly integrated into the roof architecture
  • Energy-efficient windows that resemble traditional styles
  • Hybrid heating systems that maintain the home’s traditional appearance while reducing energy consumption.

These techniques ensure that your colonial home construction remains relevant and environmentally friendly.

Heritage Preservation Techniques

Preserving the historical character of a colonial home is vital, particularly for restoration projects. Utilize techniques like:

  • Reclaimed Materials: Sourcing original bricks and timber can enhance authenticity.
  • Authentic Hardware: Using period-appropriate hardware for doors and windows connects the home to its rich past.
  • Compliance with Preservation Codes: Ensuring that renovations adhere to the guidelines set by local historical societies helps protect the structural integrity and historical significance.

Customizing Your Colonial Home Construction

Customizing a colonial home construction allows you to express your personal style while respecting traditional aesthetics. Below are various options to consider.

Interior Design Ideas

Colonial interiors often reflect elegance and simplicity. For customization, consider these ideas:

  • Color Palettes: Soft, muted colors typical of colonial homes can create a cozy atmosphere. Think warm whites, deep blues, and rich greens.
  • Furniture Styles: Opt for traditional wooden pieces with a rustic finish or antique finds that resonate with the era.
  • Textiles: Use classic patterns in curtains and upholstery, such as plaids and florals, to enhance the charm.

Landscaping for Colonial Charm

Your yard can significantly enhance your colonial home’s appeal. Authentic landscaping may include:

  • Symmetrically Designed Gardens: Create layers with shrubbery and seasonal plants.
  • Pathways: Consider old-world paving techniques with stone or brick walkways.
  • Classic Fencing: Wooden or wrought iron fences can perfectly frame your property.

Smart Home Technology Integration

Demonstrating that modern convenience can coexist with traditional charm, smart technology can elevate your living experience. Key integrations include:

  • Smart Thermostats: Ensures efficient heating and cooling without disrupting the aesthetics.
  • Intelligent Lighting Systems: Create ambiance while ensuring efficiency.
  • Home Security: State-of-the-art systems can be discreetly incorporated without detracting from historical features.

Challenges in Colonial Home Construction

Building a colonial home comes with its unique set of challenges which can be navigated with the right approach.

Navigating Local Regulations

Understanding local building codes and historical preservation laws is crucial. Engage with local planning departments to ensure compliance with zoning regulations, especially if your project is in a designated historical area. Knowledge of permissible materials and styles can save time and costs down the road.

Maintaining Authenticity While Modernizing

Finding a balance between modern comfort and historical aesthetics may be challenging. Utilizing skilled craftsmen familiar with colonial styles can help maintain authentic detailing while integrating contemporary features. Always select designs that respect the original architecture to ensure cohesion.

Common Construction Pitfalls

Awareness of potential pitfalls like underestimating timelines, overspending on materials, or overlooking structural integrity will streamline your project. Regular communication with contractors and setting realistic goals are key strategies to avoid these pitfalls.

FAQs

What defines colonial home construction?

Colonial home construction is characterized by traditional architectural designs, symmetrical facades, and classic materials such as wood and brick.

What are the benefits of building a colonial home?

The benefits include timeless aesthetics, strong resale value, and spacious layouts that appeal to a variety of lifestyles.

How can I ensure my colonial home remains energy-efficient?

Utilize modern insulation materials, energy-efficient windows, and HVAC systems that retain the home’s classic look while enhancing efficiency.

What materials are traditionally used in colonial home construction?

Common materials include wood, brick, and stone, often combined to create a durable and classic appearance.

How do I navigate local building regulations for colonial homes?

Consult with local authorities and historical societies to ensure compliance with zoning laws and preservation guidelines specific to colonial styles.

Plumber providing whole house repiping services St Petersburg FL with modern tools.

Top Whole House Repiping Services St Petersburg FL: What You Need to Know

Understanding Whole House Repiping

What is Whole House Repiping?

Whole house repiping is the process of replacing the existing plumbing system in a home with new pipes. This extensive renovation is often necessary when the current plumbing infrastructure has deteriorated, resulting in leaks, low water pressure, or other significant plumbing issues. The aim is to ensure that a home has a safe and reliable water supply, free from contaminants and capable of meeting modern water usage demands.

When is Repiping Necessary?

Repiping becomes necessary under various circumstances. Frequent leaks, persistent low water pressure, stained or discolored water, and the presence of lead or corroded pipes are clear indicators that it may be time to consider repiping. Additionally, homes that are over 50 years old are more likely to have outdated materials that require replacement. If you experience any of these issues and live in the St. Petersburg area, exploring whole house repiping services St Petersburg FL can save you from future problems.

Benefits of Repiping Your Home

Repiping offers a multitude of benefits. First and foremost, it enhances the overall safety of your home. New pipes reduce the risk of leaks and associated damage. Additionally, repiping can significantly boost your water quality, as new pipes won’t leach contaminants that older plumbing materials might. Moreover, homeowners often experience improved water pressure, which can lead to a more comfortable living experience. Finally, modern materials can offer greater durability and lower maintenance requirements.

Choosing the Right Materials

Types of Piping Materials

When considering repiping, it’s essential to choose the right materials. The most common types are copper, PEX (cross-linked polyethylene), and CPVC (chlorinated polyvinyl chloride). Each has its pros and cons. Copper is long-lasting and very durable, but it can be more expensive and requires specialized installation. PEX is flexible, resistant to scale and chlorine, and generally easier to install, making it a popular choice for many homeowners. CPVC is less costly than copper and offers good resistance to corrosion and heat.

Comparing Copper vs. PEX

The choice between copper and PEX often comes down to cost, installation complexity, and personal preference. Copper has been the traditional standard for decades, known for its durability and longevity. However, it is more expensive and can be prone to theft. PEX, while not as robust as copper, is easier to install due to its flexibility, reducing labor costs. It’s also resistant to freezing temperatures, making it an appealing option in colder climates.

Impact on Water Quality

The piping material you choose can significantly affect your water quality. Copper pipes can impart a metallic taste and, over time, corrode, leading to lead contamination if not installed properly. PEX, on the other hand, does not leach chemicals and maintains the purity of your water. Ensuring that your home has high-quality, suitable piping is crucial for your health and well-being.

Signs Your Home Needs Repiping

Common Warning Signs

Homeowners should be vigilant for several warning signs that indicate the need for repiping. These include frequent leaks, visible signs of moisture or water damage, poor water quality (such as discoloration or strange odors), or fluctuations in water pressure. Additionally, you should consider repiping if your property has polybutylene pipes, notorious for failing and resulting in significant water damage.

How to Diagnose Plumbing Issues

Diagnosing plumbing issues can be complex. Homeowners should start by checking for visible leaks, inspecting faucets, and monitoring water bills for unexplained increases. A plumbing inspector can provide a thorough assessment, utilizing professional tools like cameras to inspect the interior of pipes, ensuring a comprehensive diagnosis of potential problems.

Consulting Professionals

If you suspect your home may need repiping, consulting a plumbing professional is advisable. They can conduct a detailed examination and help you understand the best course of action. Professional assessments may include pressure tests, checking the age and material of existing pipes, and identifying specific weak points in your plumbing system.

The Repiping Process Explained

Step-by-Step Overview

The repiping process typically begins with a detailed assessment by a plumbing professional. Once a decision is made, the project will include shutting off the water supply, draining existing pipes, and removing old plumbing. New pipes will be installed according to the planned layout, followed by connecting to the existing fixtures and testing the system to ensure everything operates correctly.

Timeline for Completion

The timeframe for completing a whole house repiping project can vary based on the home’s size and scope of work. Generally, the project can take anywhere from one to three days. A professional contractor will provide a more accurate timeline after inspecting your home and evaluating your plumbing system.

Post-Repiping Maintenance

After repiping, it is essential to maintain your plumbing system to extend the life of the new pipes. Regularly check for leaks, assess water pressure, and keep up with routine maintenance, such as flushing the water heater and checking for sediment buildup. Scheduling periodic inspections by a plumber can also help catch potential issues early.

FAQs About Whole House Repiping

How long does repiping usually take?

Most whole house repiping projects can take one to three days, depending on the size of the home and complexity of the plumbing system.

What is the cost of whole house repiping?

The cost can vary widely but typically ranges from $4,000 to $15,000 based on materials used and labor costs.

Will my water pressure improve after repiping?

Yes, repiping often improves water pressure, especially if old corroded pipes are replaced.

Should I repipe my home if it’s new?

If you have a new home but suspect inferior materials were used, consult a professional to assess if repiping is necessary for quality.

Can I do whole house repiping myself?

While DIY is an option, hiring professionals is recommended to ensure safety and compliance with local plumbing codes.

Cabinet Refacing Largo FL showcasing modern kitchen cabinetry with elegant finishes.

Elevate Your Space with Cabinet Refacing Largo FL Services

Understanding Cabinet Refacing Largo FL

What is Cabinet Refacing?

Cabinet refacing is a remodeling process that involves updating the exterior of your existing cabinets without replacing them entirely. This approach typically includes replacing the cabinet doors and drawer fronts, applying a new veneer or laminate to the cabinet boxes, and adding new hardware. It’s an efficient way to rejuvenate your kitchen or bathroom space at a fraction of the cost of complete cabinet replacement. If you’re considering a makeover for your cabinets, exploring Cabinet Refacing Largo FL services can be a great starting point.

Benefits of Cabinet Refacing

The benefits of cabinet refacing are manifold. First and foremost, it’s cost-effective. Instead of investing in entirely new cabinets, which can be a significant financial burden, refacing allows homeowners to achieve a refreshed look without the exorbitant expense. The process is also quicker; most refacing projects can be completed in just a few days, minimizing disruption to your daily routine.

Additionally, cabinet refacing offers a wide array of aesthetic options, allowing you to choose materials, colors, and finishes that align with your personal style. Environmentally conscious homeowners will appreciate that refacing reduces waste by keeping the cabinet boxes intact, thereby decreasing the amount of material sent to landfills.

Differences Between Refacing and Replacement

Understanding the distinctions between cabinet refacing and replacement can help you make an informed decision for your home. Cabinet refacing, as mentioned, focuses on the superficial aspects of your cabinets, rejuvenating their appearance while retaining the existing framework. On the other hand, cabinet replacement involves removing the old cabinets entirely and installing new ones, which can take significantly longer and involve higher installation costs.

Another key difference is the impact on kitchen functionality. Refacing does not usually alter cabinet configurations or layouts, which may be a drawback if you desire a different design or additional storage space. Conversely, replacement allows for customization of layout and functionality, catering to more extensive changes a homeowner might wish to achieve.

Choosing the Right Materials for Refacing

Types of Cabinet Materials

When it comes to cabinet refacing, the materials you choose play a crucial role in the overall outcome. Common materials include veneers, laminates, and solid wood. Veneers are thin sheets of wood that are glued onto the cabinet frames, offering a natural wood appearance at a reduced cost. Laminates, made of plastic, are available in a myriad of colors and patterns and are known for their resistance to scratches and stains.

Solid wood, although more expensive, provides durability and a premium look. It’s essential to select materials that not only match your design vision but also meet practical requirements such as resistance to warping or damage, especially in moist areas like kitchens and bathrooms.

Finishes and Color Options

The finish you choose for your newly refaced cabinets significantly impacts their aesthetic appeal and durability. High-gloss finishes can add modern elegance, while matte finishes tend to offer a more rustic or traditional look. In terms of color, popular choices range from classic whites and creams to bold hues that make a statement. It’s advisable to consider trends as well as your personal preferences, ensuring that the colors chosen will endure over time.

Durability Considerations

Durability is a critical factor to assess when selecting materials for cabinet refacing. The cabinet finishes should stand up to everyday wear and tear, especially in busy areas like the kitchen. Scratch-resistant finishes are advisable if you have pets or children. Additionally, waterproof laminates or treated wood are ideal for areas exposed to moisture. Prioritizing durable materials not only ensures longevity but also enhances the overall return on investment for your refacing project.

The Cabinet Refacing Process

Initial Consultation and Design Planning

The cabinet refacing journey begins with an initial consultation. During this stage, homeowners meet with design professionals to discuss style preferences, material choices, and budget considerations. It’s crucial to communicate your vision clearly to ensure that the design aligns with your functional needs and aesthetic desires.

After assessing the current condition of your cabinets, professionals will provide recommendations on styles and materials that would work best. Planning the design meticulously sets the foundation for a successful refacing project.

Installation Steps Explained

Installation of refaced cabinets typically follows a structured process to ensure quality results. Initially, the existing cabinet doors and hardware are removed. Next, the cabinet boxes are cleaned and prepped for the new veneer or laminate application. After the surface is adequately prepared, the new material is applied, followed by the installation of new doors, drawer fronts, and hardware. This process is generally quick, often completed in a few days, depending on the size of the project.

Throughout the installation, attention to detail is crucial to ensure alignment and finish quality. Experienced installers will manage the process carefully, adhering to best practices to achieve a polished look.

Post-Installation Care and Maintenance

Once your cabinets are refaced, maintaining their appearance is vital. Regular cleaning with gentle, non-abrasive cleaners will prolong the life of the finishes. It’s advisable to avoid harsh chemicals that can degrade surfaces. Additionally, routinely checking hardware for loose screws and repairing any minor damages immediately can assist in preserving the longevity of your cabinets.

Consider following a maintenance schedule to ensure your cabinets remain in pristine condition. This conscious approach will aid in protecting your investment and keeping your newly refaced cabinets looking fresh and inviting.

Cost Factors for Cabinet Refacing in Largo FL

Budgeting for Your Project

Budgeting is an essential aspect of planning your cabinet refacing project. The costs associated with refacing vary widely depending on factors such as cabinet size, material choices, and local labor rates. On average, homeowners can expect to spend significantly less on refacing compared to full cabinet replacement, making it an appealing option for those looking to upgrade their space economically.

It’s advisable to establish a clear budget upfront and maintain a contingency fund for unexpected expenses that may arise during the project. Having a financial plan will help streamline the process and keep you focused on your goals.

Quality vs. Cost: Finding the Balance

While staying within budget is crucial, it’s equally important not to sacrifice quality for lower costs. Investing in higher-quality materials can yield long-term benefits, such as improved aesthetics, durability, and performance. It’s worthwhile to conduct thorough research to identify trusted suppliers and professionals who can deliver quality results without excessive pricing.

Balancing quality and cost requires careful consideration of your specific needs and future goals for your space. Prioritizing what aspects are most important to you—in terms of both material quality and craftsmanship—can aid in making wise decisions.

Financing Options Available

Many homeowners exploring cabinet refacing options may find financing beneficial in managing project costs. Various financing options may include personal loans, credit lines, or specific financing programs offered by contractors. It’s essential to review and compare the terms of each option to select what best suits your financial situation. Understanding the terms can help you make an informed decision without imposing financial strain.

Additionally, consult with your refacing provider. Many reputable contractors offer flexible payment plans, enabling you to spread the expense over several months without compromising your financial stability.

Frequently Asked Questions

How long does cabinet refacing take?

Typically, cabinet refacing can be completed within a few days, depending on the size of the project. Initial consultations and design planning may take additional time.

Can I customize the design of my cabinets?

Yes, cabinet refacing allows for significant customization, including design, materials, colors, and finishes. Homeowners can achieve a personalized look while keeping the existing cabinet structure.

Is cabinet refacing suitable for all cabinet types?

While most cabinet types can be refaced, certain conditions such as structural damage or severe wear may necessitate replacement instead. It’s best to consult with professionals to assess your cabinets’ suitability for refacing.

What is the average cost of cabinet refacing?

The average cost of cabinet refacing can range from $3,000 to $9,000, depending on various factors such as cabinet size, materials, and labor costs. Custom options may influence the price further.

How can I maintain my newly refaced cabinets?

To maintain your refaced cabinets, clean them regularly with soft cloths and mild cleaners, avoid harsh chemicals, and check for loose hardware periodically to ensure long-lasting beauty and functionality.

Discover Cape Cod homes featuring an elegant attached garage and coastal charm in a picturesque setting.

Enhancing Cape Cod Homes: Expanding Architecture with Attached Garages

Understanding Cape Cod Homes

Cape Cod homes have long been admired for their charming and symmetrical design that resonates with New England’s coastal heritage. Known for their simple and functional architecture, these homes are a reflection of the region’s history and the lifestyle of its inhabitants. If you’re considering expanding your home or simply drawn to the aesthetic of cape cod homes, it’s essential to understand their foundational characteristics.

History of Cape Cod Homes

The architectural style we recognize today as Cape Cod homes has its roots in the early 17th century, influenced heavily by the first settlers who arrived in Massachusetts. Originally designed to withstand harsh weather conditions, these homes were simply constructed with wooden frames, steep roofs for snow runoff, and small windows to retain heat. As the years progressed, variations of the style emerged, incorporating more modern elements while retaining its classic charm.

Architectural Features of Cape Cod Homes

Recognized for their unique and functional design, Cape Cod homes typically feature low-slung roofs, symmetrical facades, and dormer windows. They often have clapboard siding painted in classic colors such as white, gray, or pastel shades. The interior layout is usually open, promoting efficient use of space, with a central fireplace serving as a focal point. Many Cape Cod homes also include porches that allow for admiration of the surrounding landscape.

Benefits of Cape Cod Homes

One of the main advantages of Cape Cod homes is their timeless design, which appeals to a broad audience, and their practical features that ensure durability and energy efficiency. Their relatively simple construction means they can be built or expanded more quickly than more complex architectural styles. Furthermore, their intimate size and efficient layouts make them ideal for families or couples looking for a cozy living environment.

Planning Your Cape Cod Home Expansion

Deciding to expand your Cape Cod home is an exciting venture that requires careful planning and consideration. Whether you’re looking to add an attached garage or increase living space, an expansion can significantly enhance your property’s value and functionality.

Assessing Your Needs for an Expansion

The first step in planning an expansion is to assess your specific needs. Consider how much additional space you require and what its purpose will be—whether it’s for additional bedrooms, a home office, or a garage. Assess your current lifestyle and future plans to ensure that the expansion will not only meet your immediate needs but also accommodate potential changes in the future.

Understanding Zoning and Building Regulations

Every city or town has specific zoning laws and building regulations that may affect your expansion project. It is crucial to investigate these regulations to understand the limitations concerning property lines, architectural styles, and height restrictions. Consulting with a local architect or contractor who has experience with Cape Cod homes can provide valuable insights into navigating these regulations.

Design Considerations for Attached Garages

When designing an attached garage, it’s essential to maintain the aesthetic integrity of your Cape Cod home. A garage that blends with your existing architecture increases your home’s curb appeal. Consider using the same materials and paint colors, maintaining a similar pitch on the roof, and adding windows that complement the home’s design. Functionality should also be a priority; ensure there is enough space for parking and storage while considering how the garage connects to your home.

Popular Features for Cape Cod Home Expansions

Expansions should not only accommodate your needs but also reflect modern amenities while preserving traditional styles. Here are a few sought-after features that can enhance your Cape Cod home.

Modern Amenities in Traditional Structures

Incorporating modern amenities into your Cape Cod home is possible without sacrificing its timeless style. Consider open-plan living spaces, updated kitchen designs, or upgraded bathrooms with luxurious fittings. Smart home technology can also be seamlessly integrated to improve energy efficiency, security, and convenience without altering the home’s original character.

Energy Efficiency Upgrades

An essential consideration for any home expansion project is energy efficiency. This can not only reduce utility bills but also increase the comfort of your home. During your renovation, consider adding insulation to walls and attics, installing energy-efficient windows, and using eco-friendly materials. Additionally, renewable energy options like solar panels can link back to the functionality of a traditional home while promoting sustainability.

Landscaping Ideas for Expanded Homes

Landscaping plays a vital role in enhancing the aesthetic appeal of a home. For a Cape Cod home expansion, consider creating a well-balanced outdoor space that complements the home’s architecture. Native plants that thrive in your local climate can be used to frame pathways, gardens, and seating areas, blending nature with the expanded living space. Additionally, patios and decks work well for entertaining and enjoying views of your property.

Budgeting for Your Cape Cod Home Expansion

Budgeting is a critical step in any home renovation process, particularly for expansive projects. Efficient budgeting will help ensure that your vision becomes a reality without financial strain.

Cost Breakdown of Home Expansions

The cost of expanding your Cape Cod home can vary significantly depending on the size and complexity of the project. Generally, it will involve expenses related to materials, labor, permits, and unexpected costs. A rough cost breakdown usually includes 30-40% for materials, 20-30% for labor, and the rest allocated for permits and design fees. It’s prudent to set aside an additional 10-20% of your budget for contingencies.

Financing Options for House Renovations

There are several available financing options for home renovations, including traditional mortgages, home equity loans, and personal loans. Each option has its terms and interest rates, making it essential to assess which best fits your financial situation. Consulting with a financial advisor can also provide insights into potential tax benefits or grants that may apply to your renovation project.

Estimating Return on Investment

One of the most critical considerations when expanding your Cape Cod home is estimating the potential return on investment (ROI). While home renovations typically offer increased market value, specific features can yield higher returns. Adding livable square footage, upgraded kitchens, and energy-efficient systems tend to attract buyers and can significantly raise your home’s resale value. Conducting market research on similar properties can help set realistic expectations.

FAQs About Cape Cod Home Expansions

What is a typical design style for Cape Cod homes?

A typical Cape Cod home features a low-slung design, symmetrical facade, steep roofs, and dormer windows. The style prioritizes functionality while exuding classic charm.

How can I make my garage blend with the Cape Cod style?

To blend a garage with Cape Cod architecture, use similar materials, maintain a consistent color palette, and ensure the roof style matches the home, creating cohesive aesthetics.

What permits do I need for a home expansion?

Permits vary by location, but typically, you will need building permits, zoning approvals, and possibly environmental permits. Consult local regulations to confirm your requirements.

How long does a typical home expansion take?

Home expansions can take anywhere from a few weeks to several months, depending on the complexity and size of the project. Early planning and clear communication with contractors can streamline the process.

Are there financing options specifically for home renovations?

Yes, financing options such as home equity loans, renovation loans, and personal loans are available. Explore local banks and credit unions for tailored renovation financing solutions.